Dragonsweeper is a sweet spin of classic Minesweeper. When you play it for the first time, you should discover basic mechanics somewhat quickly. It is important to read in-game grimoire.
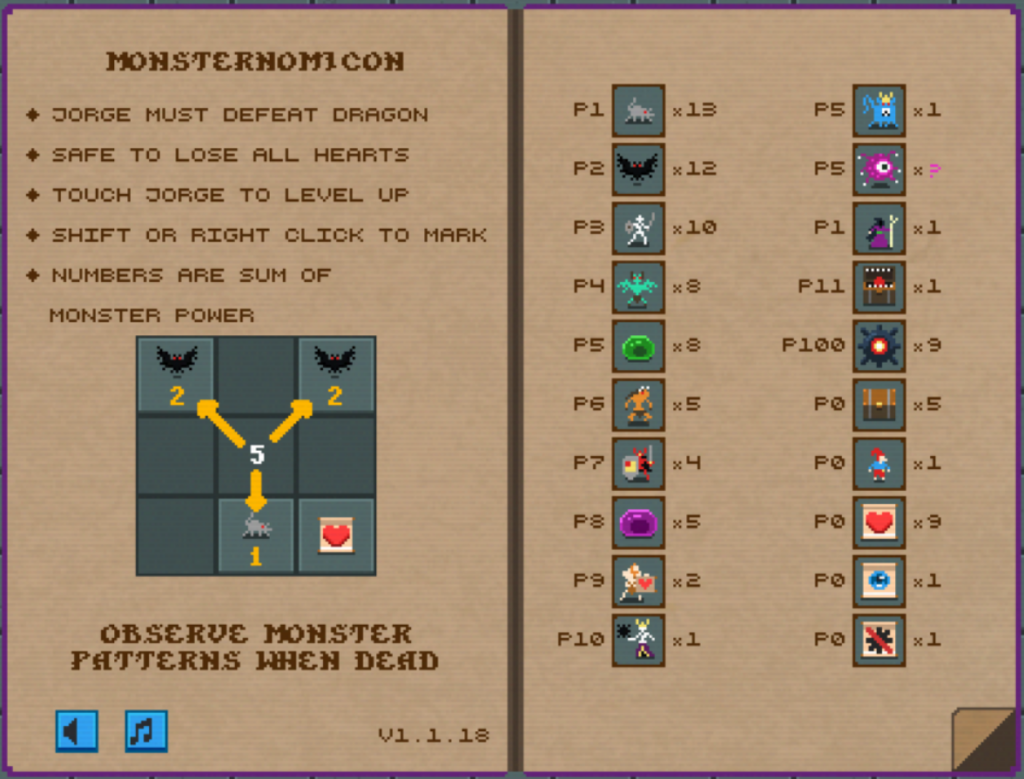
The instructions are very bare bone, but the most important is:
So before we even start, during your discovery phase, dying is not bad if you learn something from it.
When I learnt enough game mechanics, my second phase was just trying to finish the game and sweep the dragon.
Third was trying to finish all the in-game grimoire challenges.
And the last and everlasting phase, making the game needlessly hard by creating custom win-conditions.
This posts summarizes all the information I know, some practice scenarios to test how well you understand the game and my own challenges, to make the game harder.
Tile types
Each enemy’s number is the damage it deals (and the EXP it grants when killed). Spoilers ahead, obviously. Game is meant to be played by discovering those rules by yourself.
- Egg (0) — Gives 3 free EXP. Always sits next to a dragon (any of the 8 surrounding tiles).
- Rats (1) — Point toward the column containing the Rat King: left, right, or straight up/down from their own column.
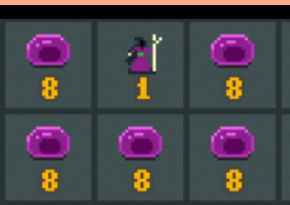
- Slime Sorcerer (1) — Killing it reveals all green and purple slimes. Always touches a wall, and is always surrounded by purple slimes (see image below).
- Bats (2) — No known rule.
- Skeletons (3) — No known rule.
- Gargoyles (4) — Always appear in pairs, always facing each other.
- Slime (5) — No rule.
- Fog of War creep (5) — Hides numbers from revealed tiles in a wide area (all 8 surrounding tiles plus 4 tiles at horizontal/vertical distance 2). If you kill an enemy inside its area of influence, you’ll see a question mark instead of the number. Killing the fog creep itself reveals the hidden numbers.
- Rat King (5) — Killing him reveals the positions of all rats.
- Demon (6) — On one of the 6 horizontally/diagonally adjacent tiles (not above or below) there is a chest. Conversely: every chest has a demon on a tile next to it (again, never above or below). Opening a chest drops either a heart or a pile of gold (5 EXP). After the chest opens, the bound demon turns to face it.
- Guardian (7) — Each quadrant contains exactly one. This means the middle row and middle column (same as the dragon) contain no guardians.
- Purple Slime (8) — Always guards the Slime Sorcerer.
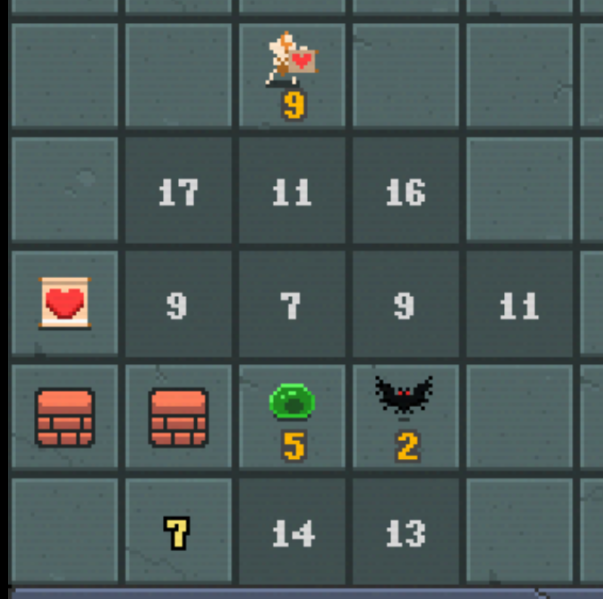
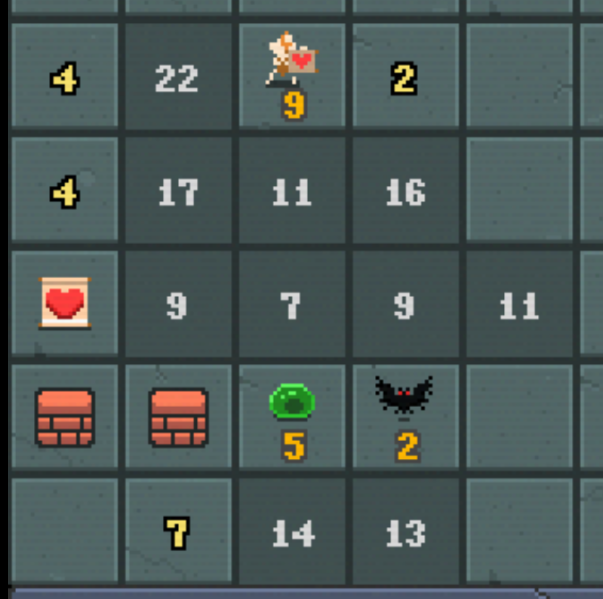
- Lovers (9) — Always a pair facing each other, on the same row, equidistant from the middle column (often easier to count distance from the wall). Killing them drops a heart.
- Skeleton King (10) — Killing him deactivates all mines.
- Mimic (11) — Looks like a chest, but has no demon guarding it.
- Dragon (13) — Killing it drops a treasure worth 13 EXP. After you pick up the treasure a dragon skeleton remains; the game ends when you pick that up.
- Mine (100) — Instant death. After the Skeleton King dies all mines are deactivated and each gives 3 free EXP.
Additional Tiles
- Starting Seeing Orb — Available from the start.
- Wall (3 × 1 HP) — Click three times to break it; gives 1 EXP.
- Second Seeing Orb — A tile that fully reveals a 3×3 area. The center appears to be random, but always lands on at least one unexplored tile.
- Dwarf — Clicking him makes him jump to some empty tile. If no empty tile remains, you’ve cornered him: he dies and drops a treasure worth 9 EXP.
Challenges
In-game
- Lovers Survive — You can click the lovers’ tiles to reveal them, but don’t kill them. Harder, because you can’t use 2 hearts to heal up.
- Clear Board — Reveal everything. Walls don’t have to be destroyed.
- Future Generations — Don’t destroy the egg. Don’t click any tile next to a dragon unless you know it isn’t a 0 (the egg).
- Rat Pacifist — Kill no rats. The Rat King is fair game.
Custom (easy)
- Don’t use any reveal orbs (including the starting one).
- Finish the game in under 15 minutes.
Custom (hard)
- Do Lovers Survive, Future Generations, and Rat Pacifist in a single run.
- Finish the game in under 8 minutes.
- Perfect usage of Health. Don’t use any hearts before you picked all possible exp sources. To complete this challenge, you need either extreme luck OR play very well and a lot of luck. I can do this in less than 1/50 games when counting only games with somewhat lucky start.
- egg – easy
- 3 exp chests – sometimes you don’t find it
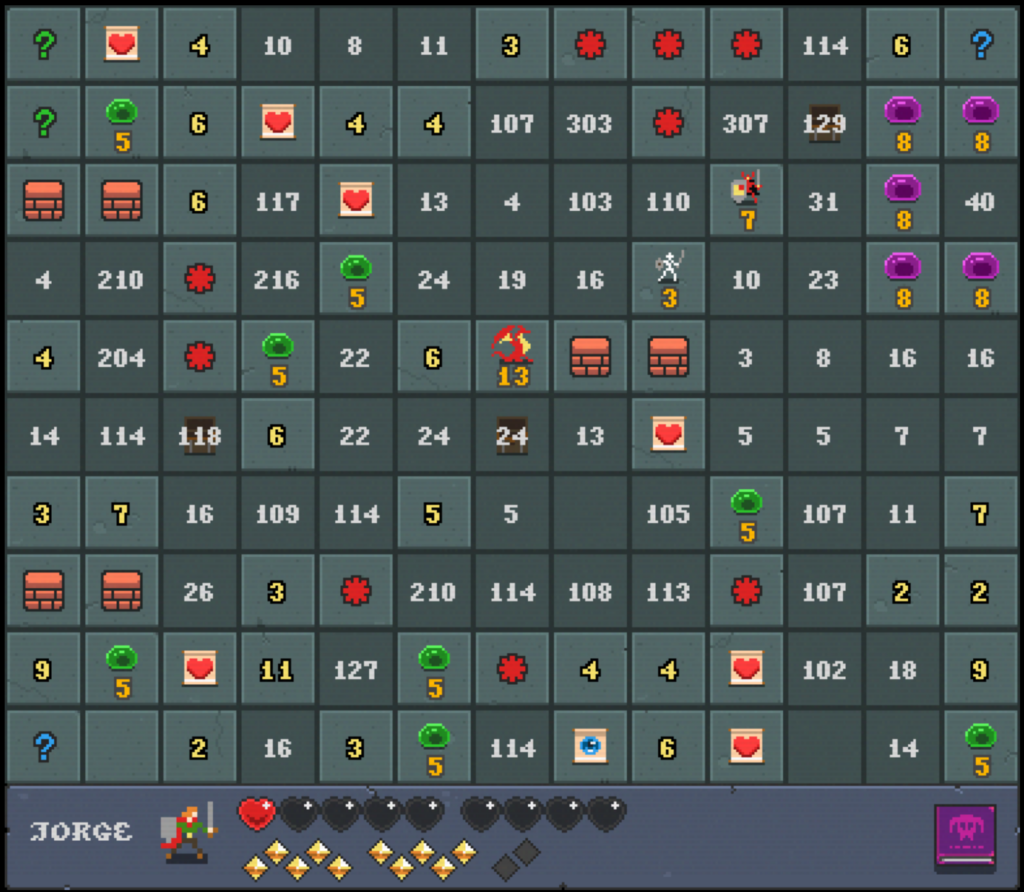
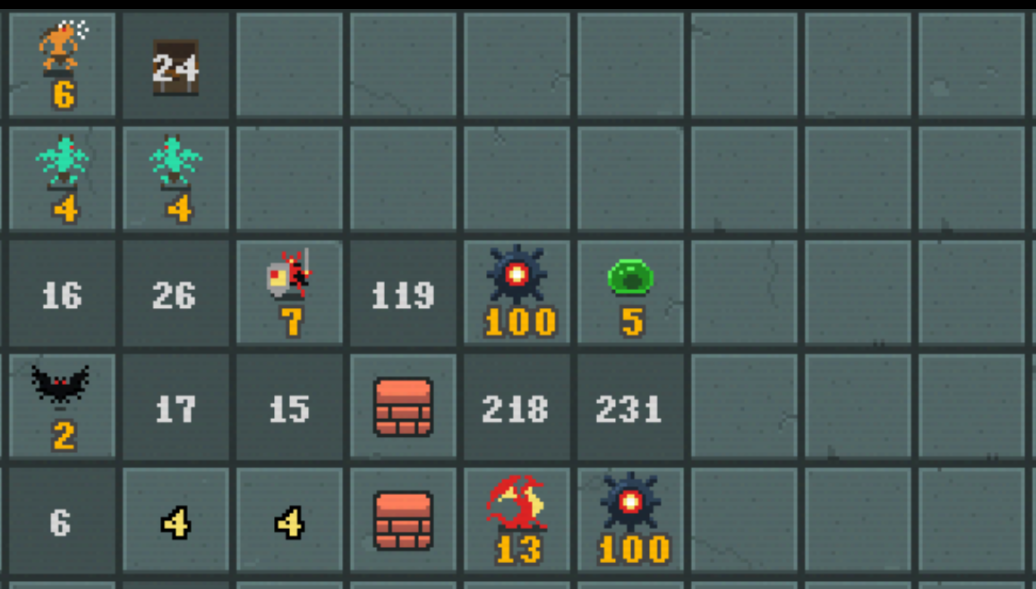
- dwarf – even with my best play and a lot of luck in the early and middle game, I usually end up with 4-8 candidate tiles where the dwarf can be and I have to pick randomly and hope. This is drastic and unforgiving.
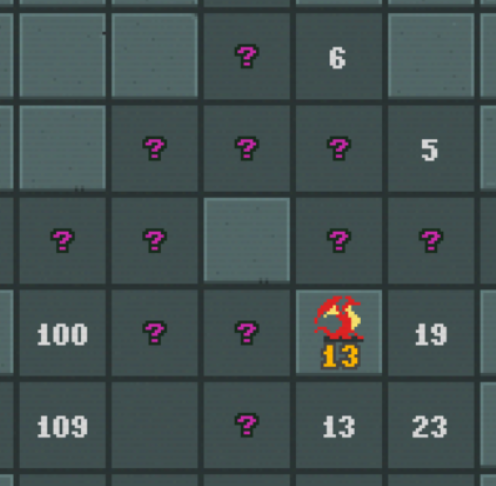
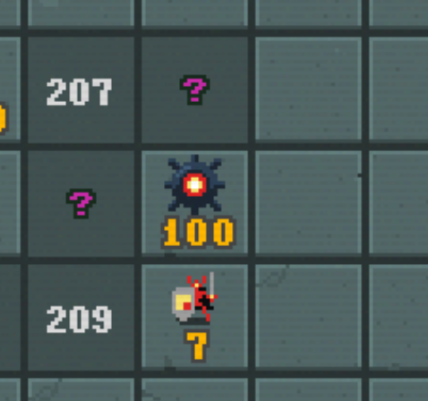
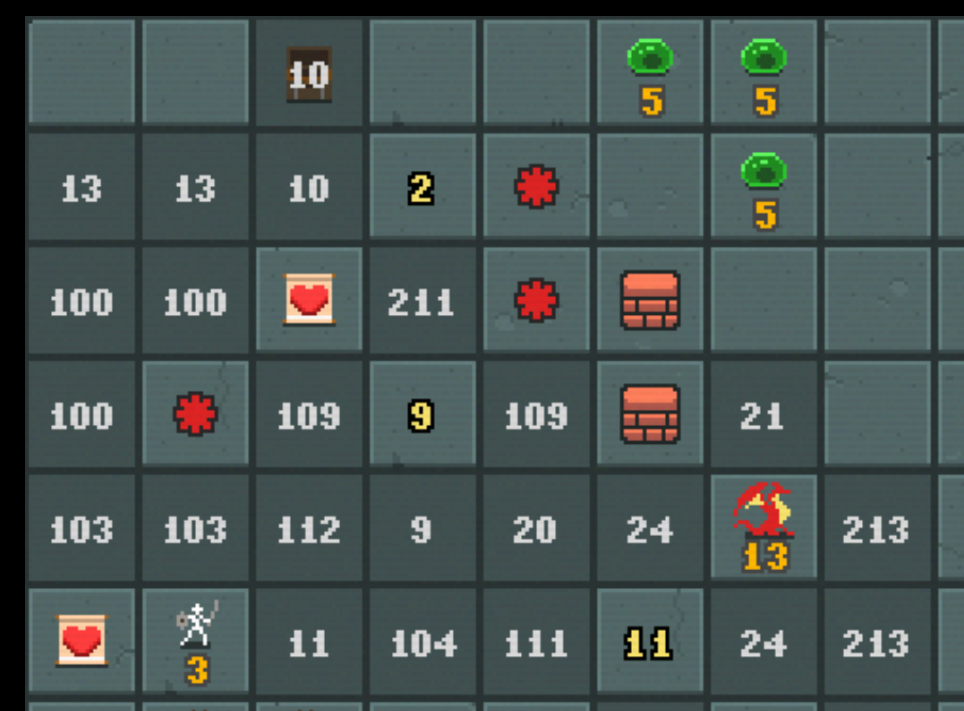
- e.g. in the following game, I was already quite lucky to get to this point. Now, I just have to click somewhere and hope I will find the dwarf. I know corners can have 10. I also know that upper left segment will have 7. So it is slightly better to click on one of 3 bottom tiles not in corner.

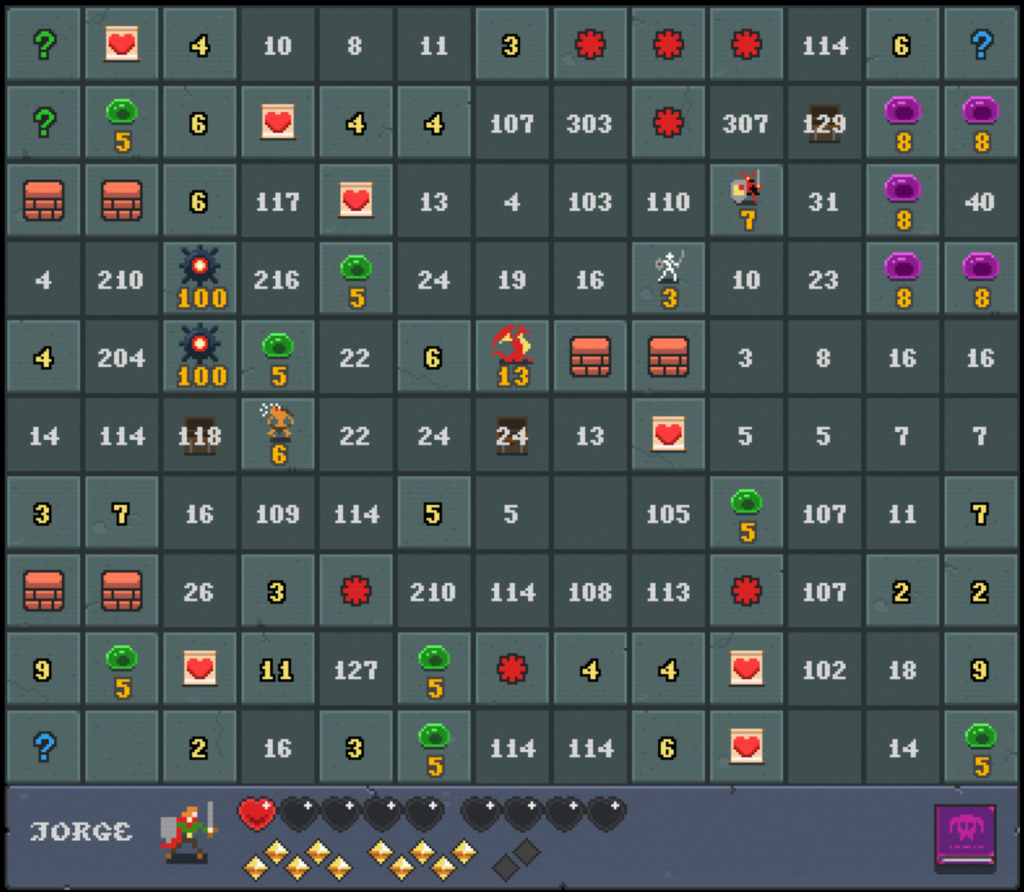
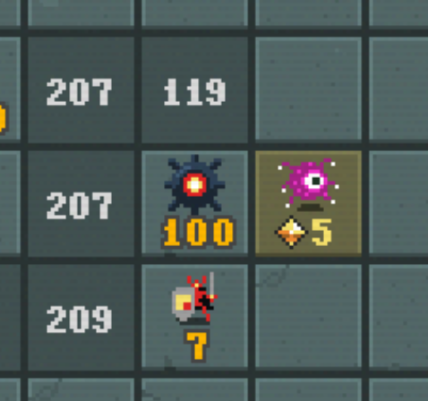
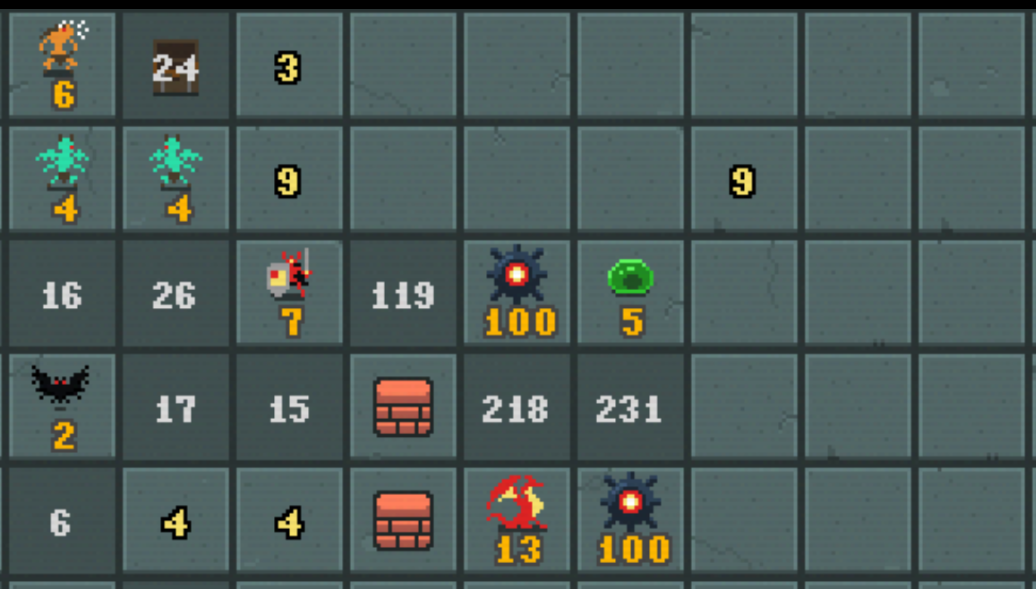
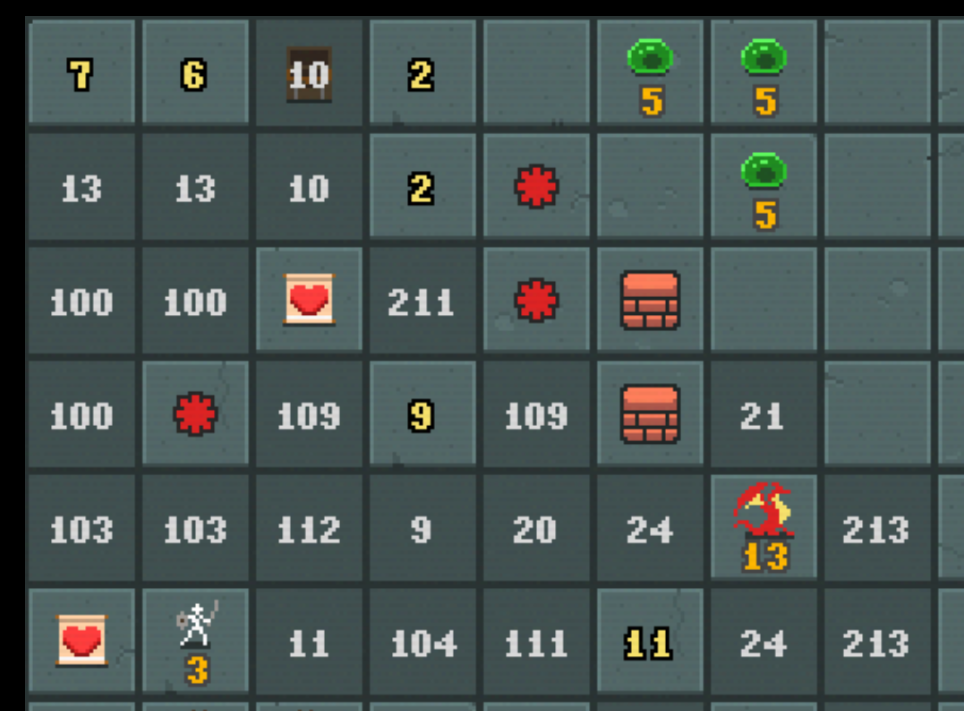
and I got lucky:
but the reveal orb was useless :/. It revealed just mines in middle of third column. So now, I have to guess again.
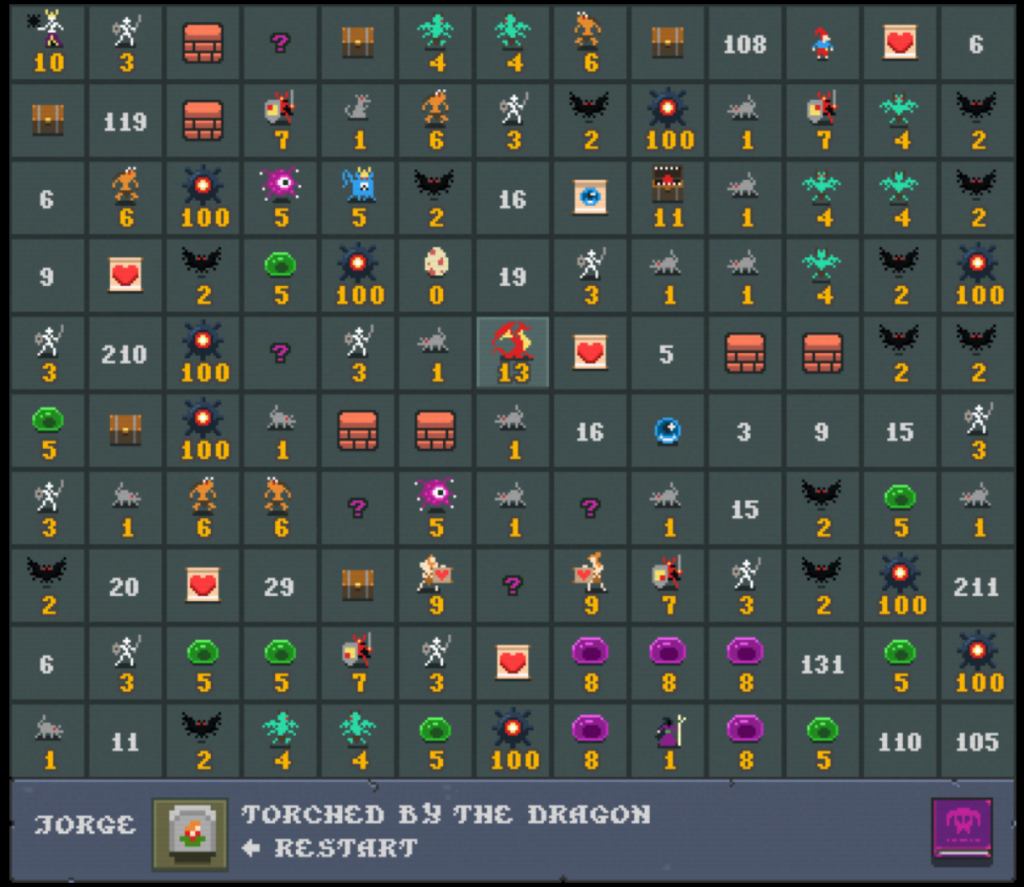
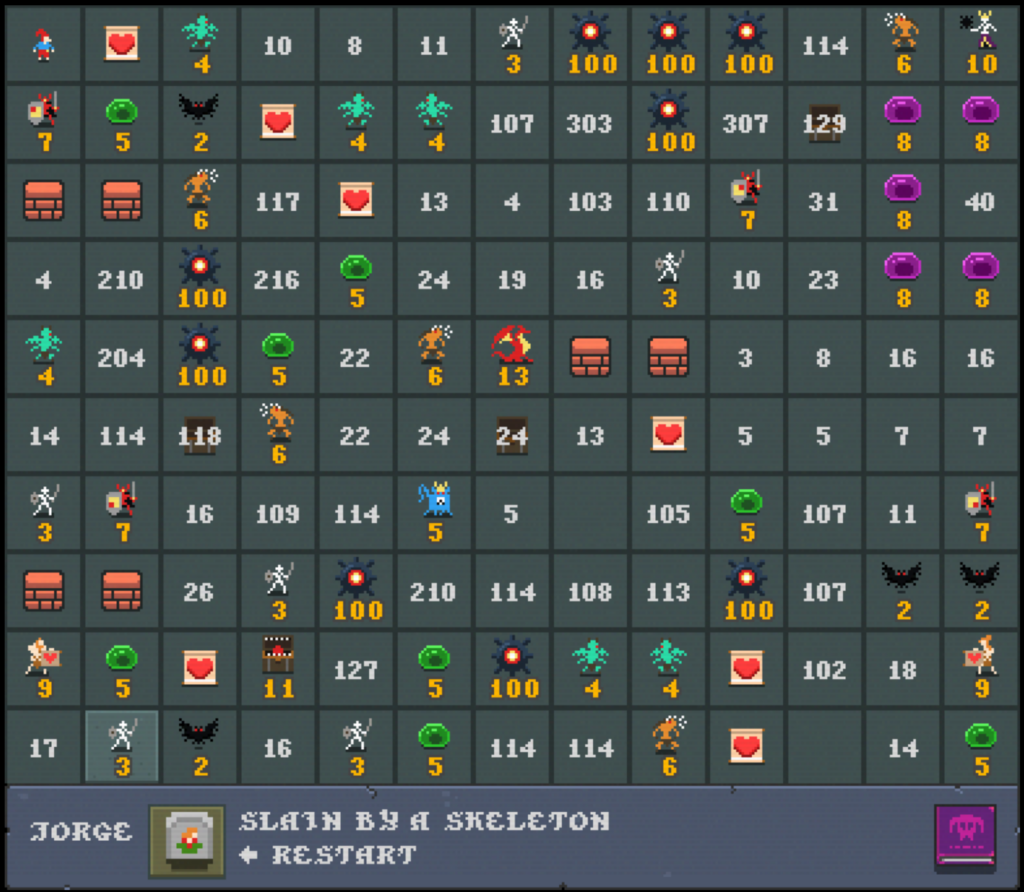
and game over:
Strategies
Basic
- Try to explore as much space as possible. If you have two hearts and you see two areas where the enemies sum to two damage each, explore the larger area first.
- Mark everything you know. If you discover first of paired tile like wall, Gargoyle, Lover, immediately mark the second one (if possible). Use one question mark for possible demons after discovering a chest. Use other one for possible gargoyles, if there is more options than one.
- Egg first – try to click on the tile next to dragon in hopes of clicking egg. If you die, just reload. If you succeed, your game will be a little bit easier. My unverified intuitions:
- 2 horizontal and 2 vertical dragon neighboring tiles cannot have 7. Might be better to click those.
- If you create a non-deterministic dangerous area, just click. It’s better to die early than late. (applies only for some challenges, in normal play, you can always wait until you have enough lives).
Puzzles
For each puzzle, just try to deduce as much information as possible.
Easy
Show solution
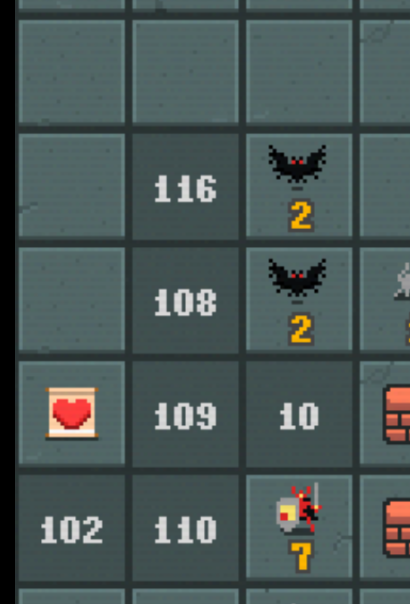
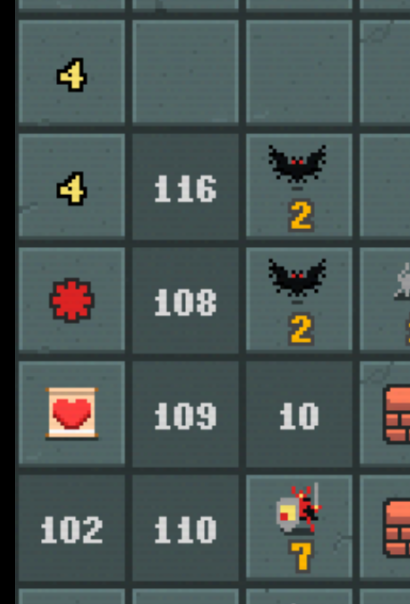
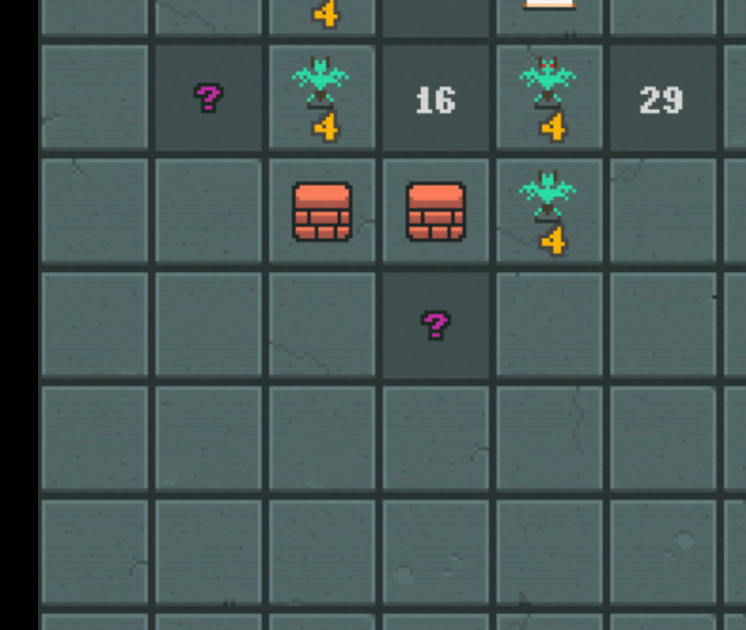
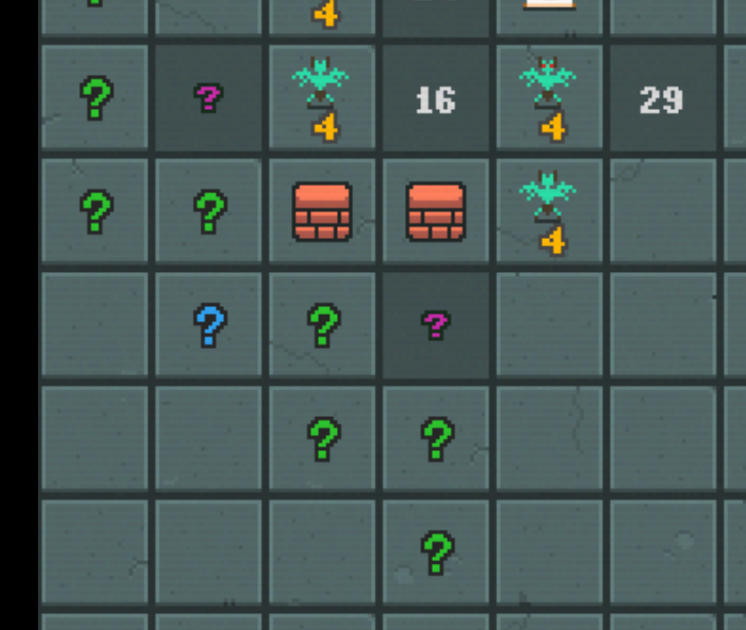
It is important to mark both 4 if you discover first one, and there is only one free direction.
Show solution
Fog slime cannot be anywhere else.
Show solution
First 4 is simple counting, second must be there, and then again we just count.
Show solution
There should be 1 instead of 3. But the point is different. We already practice with pair of 4s, we also should not forget to mark second 9.
Show solution
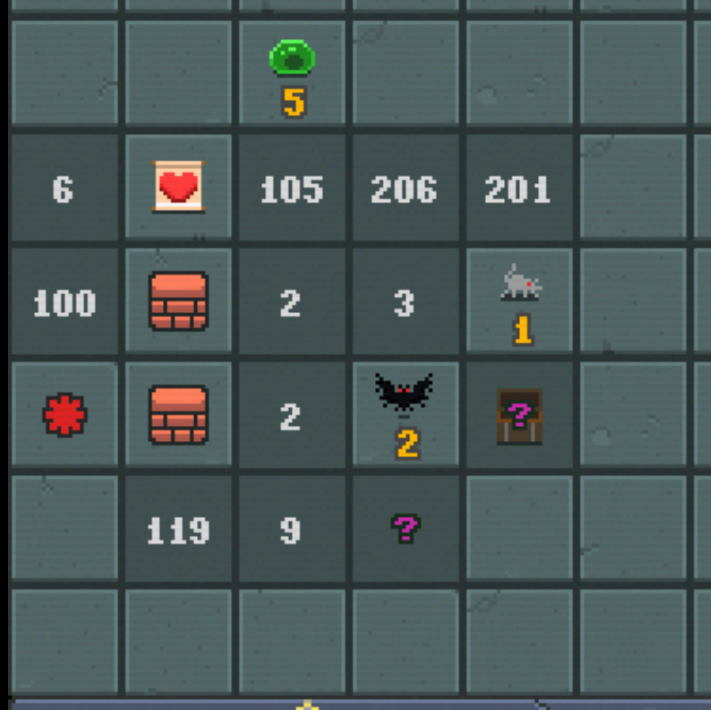
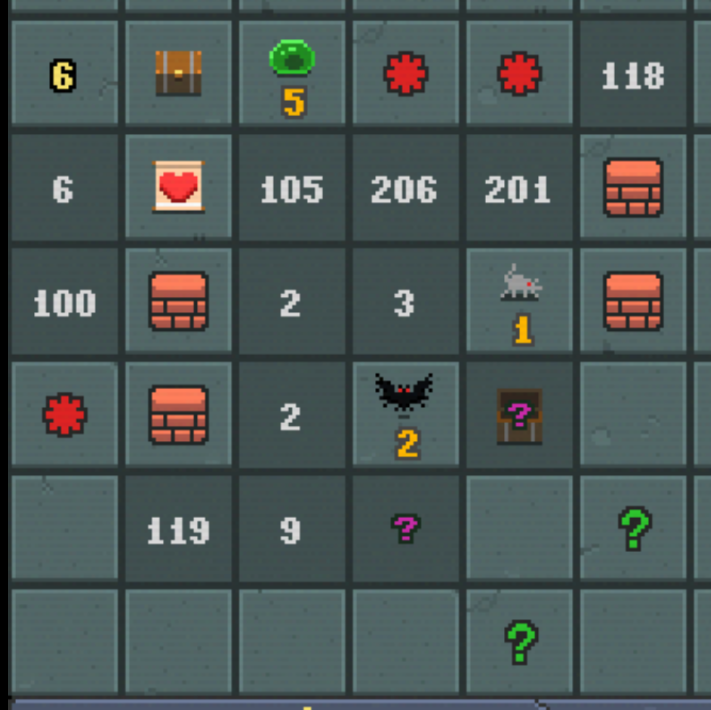
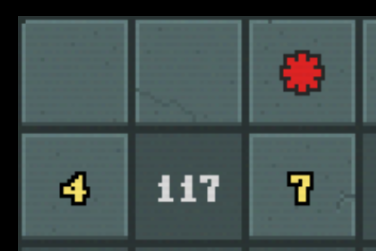
Crux is tile with chest. Because of 105 and 5, we no there won’t be any creep. And because of 6, there can’t be any mine. If there was empty square, we would know that the chest is above it. Anyway, 0 hp used to reveal 7 tiles, imho sweet sweep.
Show solution
This one was tricky, sorry. But sometimes fog creeps can overlap. You will get killed if you don’t consider this possibility. Here, we can have either one fog creep at the purple, or bunch of them on the green tiles.
Show solution
Just counting and subtracting.
Medium
Show solution
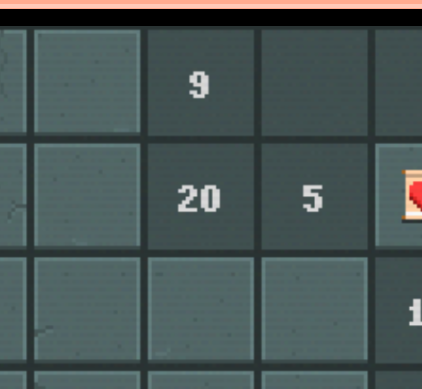
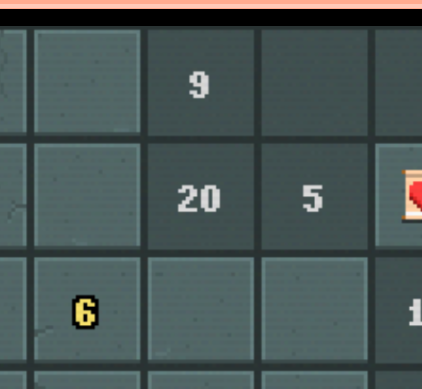
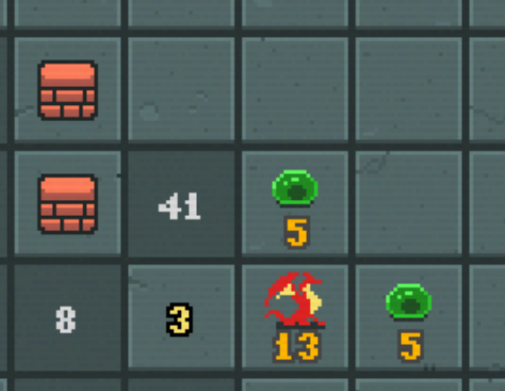
13 must be 6+7 and 6 must be touching the chest.
Show solution
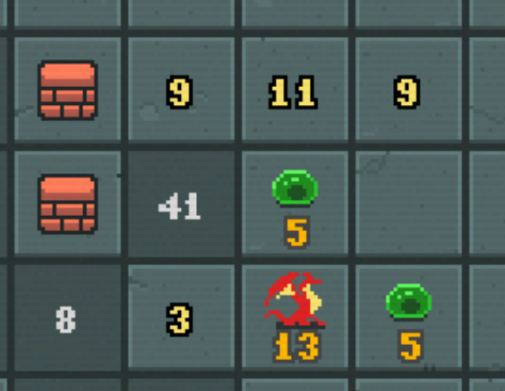
We need 20 on two tiles. Only creeps that give this are 9 and 11. And 11 cannot be above dragon, because it needs to be paired with the other lover.
Hard (not puzzle)
If you are scraping to save all the hp you possibly can during some challenge run, sometimes it is better to just bite the bullet and click and hope there will be a chest. Spending 7 hp to safely explore this corner is probably too much.
That’s it
Mainly, go play the game, it is fun.
Leave a Reply